
Traditional pendant lighting brings architectural character and warm ambiance to spaces where recessed cans and track lights fall flat. Unlike trendy fixtures that date a room in five years, well-chosen traditional pendants anchor a design with the kind of staying power found in crown molding or hardwood floors. They blend function with formal detail, cast metal, hand-blown glass, fabric shades, and they scale from intimate breakfast nooks to two-story foyers. For homeowners renovating kitchens, updating dining rooms, or adding polish to entryways, traditional pendants offer both task lighting and a focal point that feels intentional, not temporary.
Table of Contents
ToggleKey Takeaways
- Traditional pendant lighting adds architectural character and lasting design impact to kitchens, dining rooms, and entryways without the dated feel of trendy fixtures.
- Proper hanging height is critical: install kitchen pendants 30–36 inches above countertops, dining pendants 30–34 inches above table surfaces, and always maintain 7 feet minimum clearance in walkways.
- Match traditional pendant finishes with your home’s architecture—brass and bell jars suit Colonial homes, mission-style lanterns fit Craftsman bungalows, and brushed nickel works with contemporary traditional interiors.
- Choose 2700K–3000K warm white LEDs over cool white for traditional pendants to complement brass, bronze, and wood finishes without flattening the design.
- Always turn off power at the breaker and use a voltage tester before installing traditional pendants, and replace plastic junction boxes with metal boxes secured to ceiling joists to safely support the fixture’s 8–20 pound weight.
- For multiple pendants or dimmable setups, use an LED-compatible dimmer installed at the switch to prevent flickering and maintain proper control without flattening warm finishes.
What Is Traditional Pendant Lighting?
A traditional pendant light is a single-bulb or multi-bulb fixture that hangs from the ceiling on a rod, chain, or cord, typically finished in classic materials like brass, bronze, wrought iron, or blown glass. The term “traditional” refers to design motifs rooted in historical periods, Colonial, Victorian, Craftsman, Georgian, rather than a specific era.
These fixtures differ from modern or industrial pendants in three ways: ornamentation (finials, scrollwork, etched glass), material finish (oil-rubbed bronze, antique brass, patina), and silhouette (bell shapes, lantern cages, urn profiles). A traditional pendant doesn’t chase minimalism: it uses detail to add texture and visual weight.
Most traditional pendants use E26 medium-base sockets, making them compatible with LED, incandescent, or CFL bulbs. Dimmable models require compatible LED bulbs and a TRIAC or ELV dimmer, standard rotary dimmers often cause flicker or hum with LEDs. Check the fixture’s UL or ETL rating to confirm it meets National Electrical Code (NEC) standards for damp or wet locations if installing near sinks or exterior overhangs.
Key Design Features of Traditional Pendant Lights
Traditional pendants share a visual vocabulary that separates them from contemporary or transitional fixtures. Recognizing these features helps homeowners match new lighting to existing trim, cabinetry, and hardware.
Materials and finishes lean toward metals with hand-applied patinas: oil-rubbed bronze, aged brass, brushed nickel, or blackened iron. Glass shades are often seeded, frosted, or etched rather than clear. Fabric drum shades in linen or silk add softness in dining rooms, though they require routine dusting and aren’t suitable for high-moisture areas.
Shade shapes include bell jars, schoolhouse globes, lantern cages with beveled or rippled glass, and inverted domes. Multi-light pendants may use candelabra-style arms radiating from a central hub. These silhouettes echo 18th- and 19th-century oil lamps, gas fixtures, and early electric designs.
Decorative elements often include cast finials, turned spindles, scrolled metalwork, and chain links with decorative connectors. Some fixtures feature canopy rosettes (the ceiling-mounted cover plate) with embossed patterns that integrate with medallions or coffered ceilings. Avoid pairing ornate pendants with ultra-plain surroundings, they need some architectural context (wainscoting, plate rails, dentil molding) to avoid looking like props.
Where to Use Traditional Pendant Lighting in Your Home
Traditional pendants work best where their detail can be appreciated at eye level or slightly above, and where the task or mood benefits from focused downlight.
Kitchen and Dining Areas
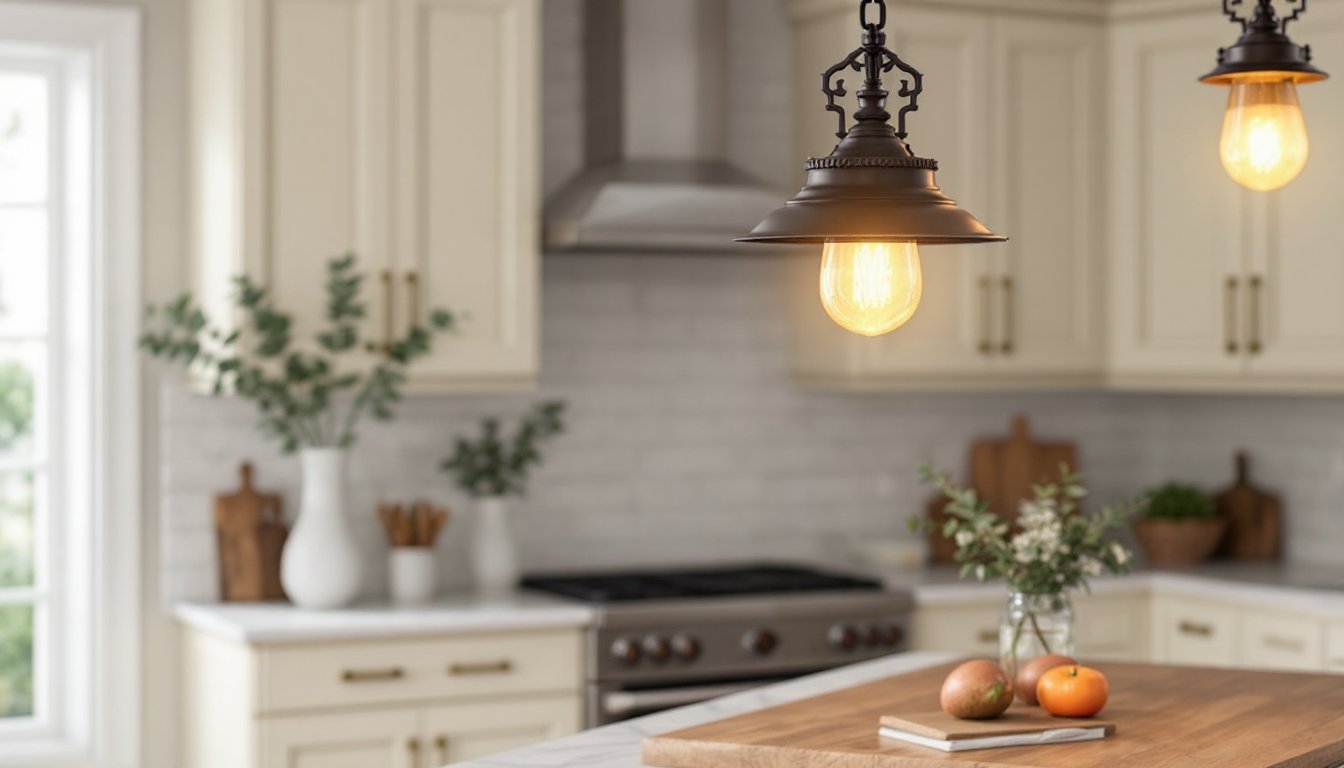
Kitchen islands are the most common application. Install pendants 30–36 inches above the countertop to avoid head clearance issues while providing task light for prep work. For a standard 6- to 8-foot island, two or three pendants spaced 24–30 inches apart create balanced coverage. Use fixtures with downward-focused shades to minimize glare on polished counters.
Pair pendants with under-cabinet LED strips (3000K warm white) to layer light, pendants handle ambiance and accent, while strips provide edge-to-edge task illumination. Make sure the pendant’s finish coordinates with cabinet hardware and faucet: mixing metals is acceptable (e.g., brass pendants with brushed nickel pulls), but keep finishes within the same warmth range.
Dining tables benefit from a single large pendant or a linear cluster. Hang the bottom of the fixture 30–34 inches above the table surface for a 9- or 10-foot ceiling. For higher ceilings, add 3 inches of drop per additional foot of ceiling height. A dimmer is essential, dining rooms need flexibility from bright family meals to low-lit dinners.
Choose a pendant diameter roughly one-half to two-thirds the width of the table to maintain visual proportion. For a 42-inch round table, a 21–28 inch pendant works: for a 72-inch rectangular table, consider a linear fixture 24–36 inches long or a grouped trio of smaller pendants.
Entryways and Foyers
Two-story foyers demand scale. A traditional lantern pendant or tiered chandelier-style fixture with a 20- to 30-inch diameter can fill vertical space without overwhelming sightlines. Hang the bottom of the fixture 7 feet above the finished floor at minimum for clearance, or align it with the midpoint of any second-floor windows to unify the elevation.
In single-story entryways, a medium pendant (12–18 inches) centered over the entry or console table adds a welcoming focal point. If the entry opens into a hallway, consider the fixture’s view from multiple angles, traditional pendants with decorative cages or glass panels look intentional from 360 degrees, whereas half-shaded task pendants can appear unfinished.
Use 3-way switches at both the entry and top of stairs in two-story installations. For exterior-adjacent entries, choose a UL-listed damp-location fixture if the door is frequently opened in wet weather.
How to Choose the Right Traditional Pendant Light
Start with the ceiling height and room scale. Measure from the finished floor to the ceiling, then subtract the minimum clearance (7 feet for walkways, 30–36 inches above work surfaces). The remaining height dictates maximum fixture drop.
For 8-foot ceilings, look for pendants with 10–16 inch shade heights and adjustable rods or chains you can shorten. For 10-foot or vaulted ceilings, longer drops (24–48 inches) prevent the fixture from disappearing into the ceiling plane.
Lumens and color temperature matter more than wattage. A medium kitchen pendant typically needs 800–1,100 lumens per fixture for task lighting. Dining and entry pendants can run 400–700 lumens for ambient use. Choose 2700K–3000K (warm white) LEDs to complement the brass, bronze, and wood tones common in traditional interiors. Avoid cool white (4000K+): it flattens warm finishes and casts a clinical glare.
Finish durability varies. Powder-coated or baked enamel finishes resist fingerprints and moisture better than living finishes (unlacquered brass, natural copper), which develop patina over time. If installing over a sink or range, confirm the fixture is rated for damp or wet locations and that glass shades are tempered.
Match the pendant’s design period to your home’s architecture. A Craftsman bungalow suits mission-style pendants with art glass and square lanterns. A Colonial revival pairs well with bell jars, hurricane shades, and wrought iron. Georgian or Federal homes call for polished brass, urn shapes, and crystal accents. Mixing periods is acceptable in transitional spaces, but avoid combining overly ornate Victorian fixtures with rustic farmhouse elements, they’ll compete rather than complement.
Installation and Placement Tips for Maximum Impact
Safety first: Turn off power at the breaker, not just the wall switch, and use a non-contact voltage tester to confirm the circuit is dead before touching any wires. Pendant fixtures are heavier than builders-grade flush mounts, if the existing junction box is plastic or attached only to drywall, replace it with a metal pancake box or fan-rated box screwed directly into a ceiling joist or blocking. Most traditional pendants weigh 8–20 pounds: consult the fixture’s instructions for box requirements.
Wire connections follow standard color codes: black (hot) to black, white (neutral) to white, bare copper (ground) to green or bare. Use wire nuts rated for the gauge, most residential lighting uses 14 AWG or 12 AWG. Twist wires clockwise, cap with the nut, and tug-test each connection. Secure excess wire inside the box with the ground folded in last.
Adjusting drop length: Most pendants ship with 6–10 feet of chain or rod. To shorten chain, remove links with pliers and feed excess cord back through. For threaded rod fixtures, cut the rod with a hacksaw and use a die to rethread the end if needed. Leave at least 6 inches of extra cord coiled inside the canopy for future adjustments.
Leveling and centering: Use a stud finder to locate joists if the existing box is off-center from your desired pendant location. If moving the box isn’t an option, use a decorative ceiling medallion (16–24 inches diameter) to visually rebalance the fixture. Medallions also cover old paint lines or patched holes from previous fixtures.
Dimming and controls: Install the dimmer at the switch, not inline at the fixture. For multiple pendants on one circuit, ensure the dimmer’s maximum load rating (measured in watts or VA) exceeds the combined fixture wattage. LED-compatible dimmers prevent strobing and extend bulb life.
Permitting: Most jurisdictions allow homeowners to replace existing light fixtures without a permit, provided no new wiring or circuits are added. If running new wire, moving junction boxes, or installing fixtures in bathrooms or above tubs, check local code, this often requires a licensed electrician and inspection. Always follow NEC Article 410 for fixture installation and clearances, especially near combustible materials or in closets.