

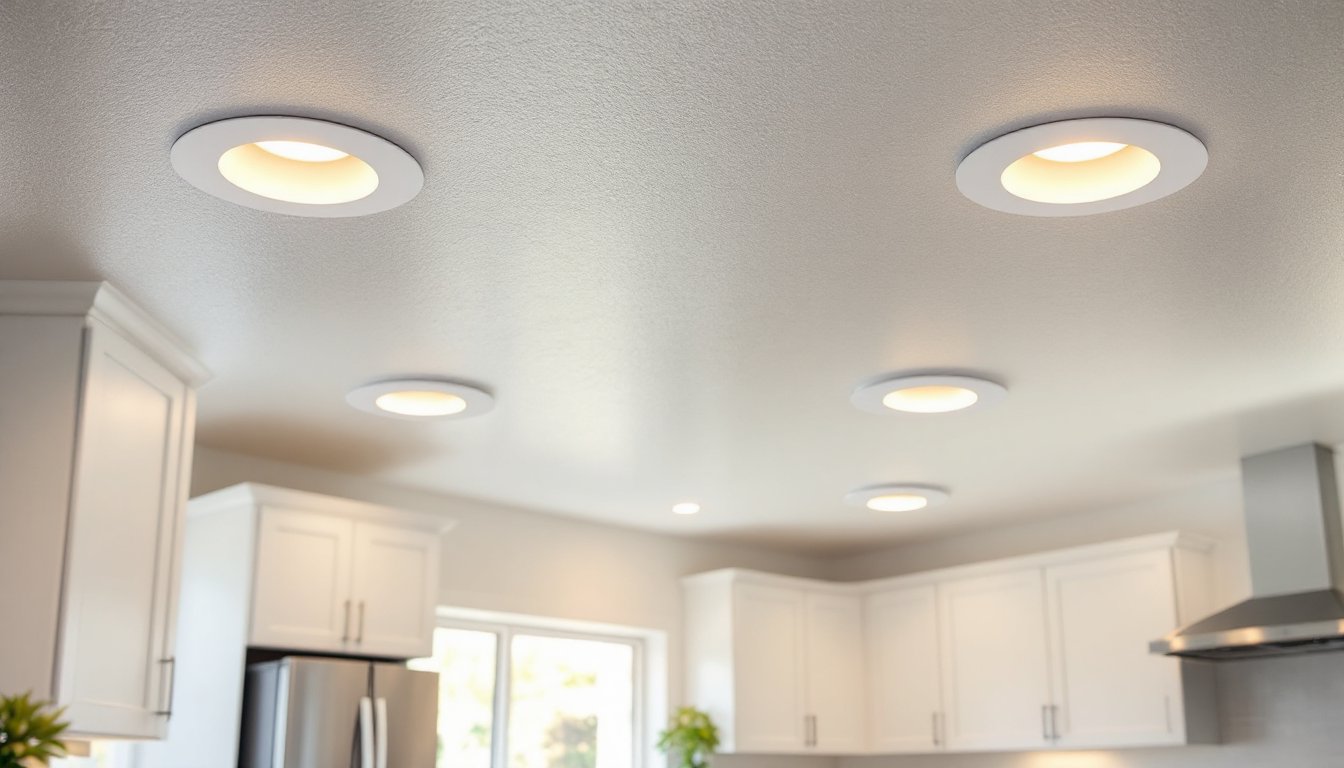
Recessed lighting transforms rooms without eating up headspace or clashing with décor. Among the most versatile options, 4 inch recessed lighting kits strike the perfect balance, small enough for tight ceiling cavities, bright enough for task lighting, and affordable enough to outfit an entire room without blowing the budget. Whether updating a dated kitchen, adding ambiance to a hallway, or meeting code-required illumination in a bathroom, these kits deliver clean, modern lighting that disappears into the ceiling. This guide walks through everything needed to pick the right kit, understand the differences between housing types, and install them correctly the first time.
Table of Contents
ToggleKey Takeaways
- A 4 inch recessed lighting kit is a complete package containing the housing, trim, and bulb or integrated LED module, designed to balance brightness, affordability, and space efficiency for any room.
- Modern 4 inch recessed lighting kits are IC-rated and airtight, making them energy-efficient and compliant with code requirements while preventing conditioned air from leaking into attics.
- These kits come in two main types—new construction (installed before drywall) and remodel kits (installed in finished ceilings)—each suited to different renovation scenarios and offering distinct cost and installation benefits.
- To choose the right kit, measure ceiling depth, determine IC/AT ratings, match color temperature to room use, calculate lumens based on square footage, and verify dimming and moisture ratings for your space.
- Proper installation requires turning off power, planning layout for symmetry, running cable before cutting holes, and carefully installing clips with electrical connections secured inside the junction box.
- Modern 4 inch recessed lighting delivers 650–900 lumens with integrated LEDs rated at 8–12 watts, lasting 50,000+ hours while replacing outdated 65-watt incandescent bulbs for significant energy savings.
What Is a 4 Inch Recessed Lighting Kit?
A 4 inch recessed lighting kit is a complete package containing the housing (the metal can that mounts in the ceiling), the trim (the visible ring or baffle), and often the bulb or integrated LED module. The “4 inch” refers to the aperture diameter, the opening where light shines through, not the overall housing size, which is typically wider to accommodate insulation clearances and mounting hardware.
Most kits fall into two categories based on application: new construction housings designed for installation before drywall goes up, and remodel (or retrofit) housings that clip into finished ceilings through a hole cut with a hole saw. Both use standard electrical boxes or integrated junction boxes rated for direct ceiling mounting.
The housings are rated as IC (insulation contact) or non-IC. IC-rated cans can touch insulation safely without overheating: non-IC units require at least 3 inches of clearance from insulation and are rarely sold today due to energy codes. Most modern kits are IC-rated and airtight-rated (AT) to prevent conditioned air from leaking into attics, which matters for both energy efficiency and code compliance under the International Residential Code (IRC).
Kits also specify ceiling thickness compatibility, usually adjustable from ½ inch to about 1 inch of drywall, and the bulb type they accept. Some accept standard Edison-base bulbs (E26), while others feature integrated LEDs that can’t be replaced separately.
Key Benefits of Using 4 Inch Recessed Lighting Kits
Compact footprint: 4 inch fixtures fit shallow ceiling cavities as narrow as 5 to 6 inches deep, ideal for older homes with limited joist bays or drop ceilings with tight plenums. Larger 6 inch cans often won’t clear ductwork or structural members.
Flexible layout: Because they’re small and unobtrusive, homeowners can space multiple 4 inch fixtures closer together for even illumination or create accent zones without visual clutter. They work equally well for general ambient lighting in hallways and targeted task lighting over counters or vanities.
Energy efficiency: Most 4 inch kits now ship with integrated LEDs rated at 8 to 12 watts, replacing old 65-watt incandescent floods while delivering similar lumens. Typical output ranges from 650 to 900 lumens per fixture, and lifespans often hit 50,000 hours, meaning a decade or more of maintenance-free use.
Code-friendly: Modern kits meet or exceed National Electrical Code (NEC) requirements for wet and damp locations (look for UL listings), and their IC/AT ratings satisfy IRC energy mandates. Many include integrated junction boxes, eliminating the need for a separate box and speeding up rough-in.
Easy retrofits: Remodel kits install from below without attic access. Clips grab the drywall from above, and the trim snaps into place, no fasteners visible, no drywall patching required if done carefully.
Types of 4 Inch Recessed Lighting Kits
New Construction vs. Remodel Kits
New construction kits mount directly to ceiling joists before drywall is hung. They feature adjustable bar hangers that span between joists spaced 16 or 24 inches on center. The housing nails or screws to the framing, and drywall installers cut around the housing or use a template. These kits cost slightly less, often $10 to $15 each in multipacks, and offer the most solid mounting. They’re the go-to choice when framing is exposed during additions, whole-house renovations, or new builds.
Remodel (retrofit) kits install into an existing finished ceiling. A hole saw cuts a precise opening (usually 4⅛ inches for a 4 inch fixture), the housing pushes up into the cavity, and spring-loaded clips or twist-lock tabs grab the back side of the drywall. There’s no need to access the attic or remove drywall. These kits cost $12 to $20 each and are ideal for updating a single room or adding lighting where none existed. They do require enough clearance above the ceiling, verify at least 6 inches of vertical space and check for obstructions like joists, ductwork, or wiring before cutting.
LED vs. Traditional Bulb Kits
Integrated LED kits have the LED module built into the housing or trim. They’re the current standard, offering consistent color temperature (usually 2700K warm white to 5000K daylight), dimming compatibility with most TRIAC dimmers, and zero bulb changes for years. The downside: when the LED eventually fails, the entire trim or module must be replaced, though most manufacturers offer 5-year warranties.
Traditional bulb kits use Edison-base sockets (E26) and accept BR30 or PAR20 bulbs. This flexibility lets users swap bulbs for different brightness, color temperature, or beam angles. But, the market has shifted heavily toward integrated LEDs, and finding quality traditional-socket 4 inch housings is harder in 2026. These kits suit homeowners who prefer maximum control or already stock compatible bulbs.
Both types come in baffle trims (ribbed interior that reduces glare, ideal for living spaces) and reflector trims (smooth white interior that maximizes output, better for task areas). Wet-rated models with sealed lenses are required in shower stalls per NEC Article 410.
How to Choose the Right 4 Inch Recessed Lighting Kit for Your Space
Measure ceiling depth. Use a stud finder to locate joists, then drill a small exploratory hole or check from the attic to confirm at least 5 inches of clearance. If space is tighter, look for ultra-thin or wafer-style LED fixtures, which mount flush with as little as ½ inch of depth.
Determine IC/AT rating. If insulation will contact the housing, common in top-floor ceilings or cathedral ceilings, an IC-rated fixture is mandatory for safety and code. AT (airtight) ratings prevent drafts and meet energy code requirements in most jurisdictions.
Match color temperature to room use. Kitchens and bathrooms benefit from 3000K to 4000K (neutral to cool white) for task visibility. Living rooms and bedrooms feel cozier with 2700K (warm white). Many integrated LED kits now offer selectable color temperature via a switch on the fixture, useful if the room’s function may change.
Calculate lumens needed. A general rule: multiply room square footage by 20 lumens per square foot for ambient lighting, or 50 lumens per square foot for task lighting. A 100-square-foot kitchen needs roughly 2,000 lumens total, so three to four 4 inch fixtures at 650 lumens each will do. Spacing fixtures 4 to 6 feet apart in a grid provides even coverage: closer spacing works for accent lighting.
Check dimming compatibility. Not all integrated LEDs dim smoothly. Look for fixtures labeled compatible with leading-edge (TRIAC) or trailing-edge (ELV) dimmers, and verify the dimmer itself is rated for LED loads, often marked with a minimum wattage lower than traditional incandescents.
Consider wet or damp ratings. Shower interiors require wet-rated fixtures with gasketed lenses. Covered porches or bathroom general areas need damp-rated at minimum. Dry-rated fixtures are fine elsewhere but won’t meet code in moisture-prone zones.
Installation Tips for 4 Inch Recessed Lighting Kits
Turn off power at the breaker. Use a non-contact voltage tester to confirm circuits are dead before working. Recessed lights typically share circuits with other devices, so double-check.
Plan the layout on the ceiling. Mark fixture centers with painter’s tape, ensuring they’re at least 12 inches from walls and aligned with room geometry. Offset layouts look accidental: symmetry reads as intentional design.
Run cable before cutting holes. For new construction, staple 14/2 or 12/2 NM-B (Romex) cable to joists, leaving 12 to 18 inches of slack at each fixture location. For remodel work, fish cable through the ceiling cavity using flex bits or a fish tape. Daisy-chain fixtures by running cable from the switch to the first fixture, then fixture-to-fixture, rather than home-running each one (though both are code-compliant).
Cut holes accurately. Use a 4⅛-inch hole saw for most 4 inch remodel kits: verify the exact size in the instructions. Go slow to avoid tear-out on the drywall face. If you hit a joist or obstruction, patch the hole with a drywall plug and shift the layout.
Install remodel clips carefully. Push the housing into the hole until the trim flange sits flush, then engage the spring clips by turning screws or pushing tabs. Clips should grip at least ½ inch of drywall thickness: if the ceiling is thicker (e.g., double layer or plaster), buy kits rated for it or add spacer brackets.
Make electrical connections inside the junction box. Strip cable sheathing back about 6 inches, strip wire ends ½ inch, and connect black to black (hot), white to white (neutral), and bare copper to the ground screw or green wire using twist-on wire connectors. Tuck wires neatly into the box and secure the cable with the built-in clamp.
Test before finishing. Restore power and check each fixture. If lights flicker or don’t turn on, verify connections and check for tripped GFCI or AFCI breakers, newer circuits often have arc-fault protection that’s sensitive to loose connections.
Install trim last. Most trims use torsion springs or squeeze tabs. Compress the springs, angle the trim into the housing, and release. The trim should sit flush and even: if it’s crooked, remove it and check that the housing flange is level.
Safety gear: Wear safety glasses (drywall dust and insulation), a dust mask (especially in older ceilings that may contain vermiculite or other irritants), and gloves when handling sharp housing edges.