
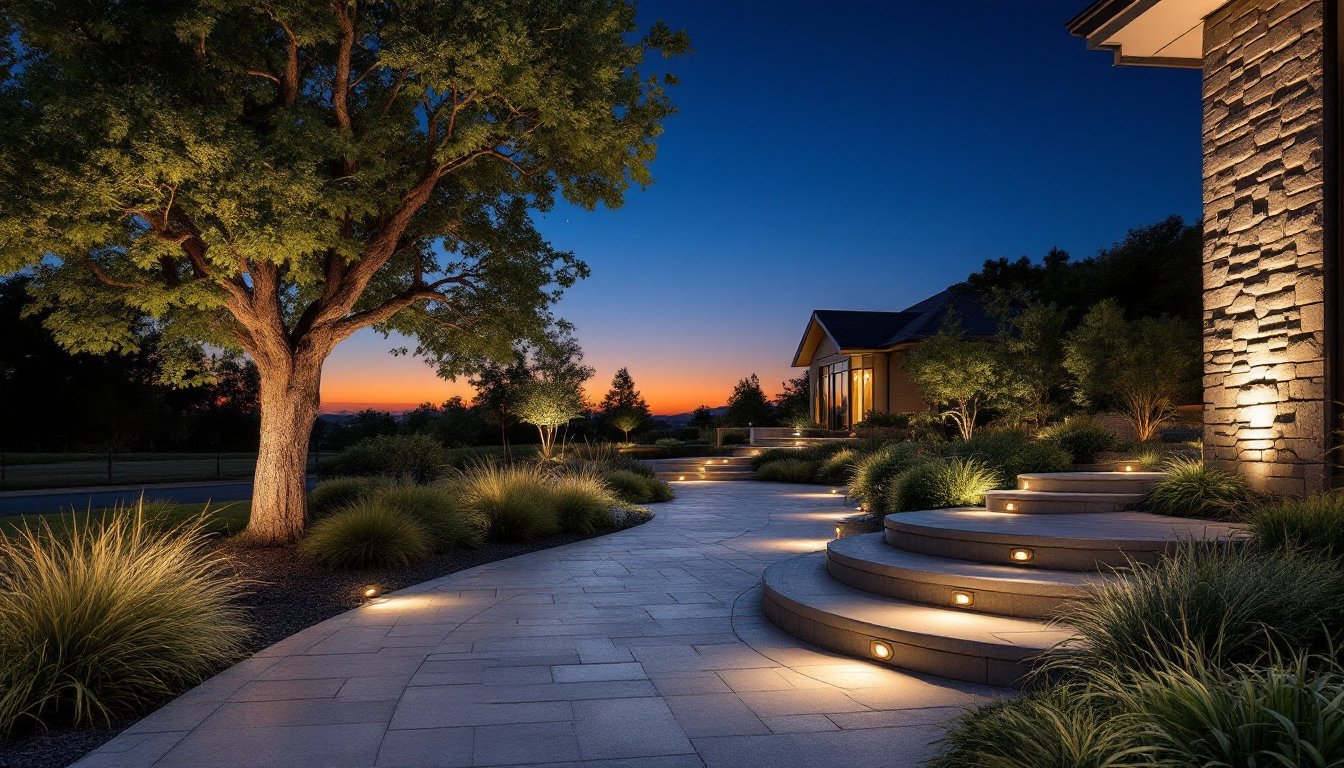
Homeowners often pour effort into landscaping beds, walkways, and patios, only to watch it all vanish after sunset. In-ground landscape lighting solves that problem by highlighting features from below grade, creating depth and usability after dark. These fixtures sit flush with or just above ground level, casting light upward or along pathways without cluttering sightlines. Whether illuminating a specimen tree, marking steps, or adding curb appeal, in-ground lights deliver drama and function where standard stake fixtures can’t. With LED technology and low-voltage systems now mainstream, installation has become more accessible for DIYers willing to dig shallow trenches and follow wire runs carefully.
Table of Contents
ToggleKey Takeaways
- In-ground landscape lighting transforms outdoor spaces after dark by using low-voltage fixtures installed at or below grade level, creating depth, safety, and visual drama without cluttering sightlines.
- Well lights, path lights, and step lights each serve distinct purposes—from uplighting trees and columns to marking walkways and stairs—with proper spacing every 8-10 feet ensuring optimal safety and coverage.
- A detailed plot plan with fixture locations, wire runs, and transformer placement is essential before installation, accounting for voltage drop limits (12-gauge wire supports up to 100 feet on 12V systems) and seasonal landscape changes.
- LED retrofit technology cuts energy consumption by 85 percent compared to halogen, with a typical 10-fixture in-ground lighting system operating for under $15 per year and improving home property value and curb appeal.
- Proper installation requires selecting IP65-rated fixtures with tempered glass lenses, burying direct-burial rated cable 6-12 inches deep with waterproof connectors, and testing voltage at the farthest fixture before final backfill.
- Strategic fixture placement that highlights architectural elements and hardscape during installation prevents the yard from looking overlit while maintaining usability and adding measured resale value for homeowners.
What Is In-Ground Landscape Lighting?
In-ground landscape lighting refers to fixtures installed at or below ground level, designed to direct light upward or horizontally across surfaces. Unlike stake-mounted or hanging lights, these units sit in a recessed housing, often metal or heavy-duty plastic, that protects electrical components from soil moisture and foot traffic.
Most systems run on low-voltage (12V or 24V) current supplied by a transformer that steps down standard 120V household power. This makes them safer to install than line-voltage fixtures and allows homeowners to handle wiring without an electrician in most jurisdictions. The transformer typically mounts near an outdoor GFCI outlet, with buried cable running to each fixture in a daisy-chain or hub layout.
Fixtures are rated by ingress protection (IP rating), look for IP65 or higher to ensure resistance to dust and water jets. The lens material matters too: tempered glass holds up better than acrylic under freeze-thaw cycles and lawn equipment impacts. Trim rings or bezels sit flush with finished grade, while the lamp assembly threads or clips into place from above for maintenance.
Key Benefits of Installing In-Ground Landscape Lights
Safety and wayfinding top the list. Recessed step lights and path fixtures eliminate trip hazards on stairs and walkways, guiding guests without glare. This is especially critical on grade changes, where shadows can hide edges.
Architectural and landscape accents become focal points after dark. Uplighting a mature oak or stone façade adds dimension that overhead lighting can’t replicate. The low angle creates long shadows and highlights texture, bark, masonry joints, ornamental grasses, turning ordinary plantings into statement pieces.
Property value and curb appeal get a measurable boost. Real estate agents note that well-designed outdoor lighting extends perceived living space and makes homes feel move-in ready. Buyers remember the dramatic entryway or illuminated patio long after the walk-through.
Energy efficiency has improved dramatically with LED retrofits. A typical 3-watt LED well light produces output comparable to a 20-watt halogen, slashing energy use by 85 percent. Many transformers now include photocells and timers, automating operation and preventing daytime waste. Operating costs for a 10-fixture system often run under $15 per year, even with nightly use.
Types of In-Ground Landscape Lighting Fixtures
Well Lights
Well lights, sometimes called uplight canisters, install completely below grade with only a lens and trim ring visible. They house an adjustable lamp that directs light upward, ideal for trees, columns, or walls.
The body ranges from 6 to 10 inches deep, requiring excavation into stable soil or a gravel base. Die-cast aluminum or brass housings resist corrosion better than stamped steel: look for powder-coated finishes for added protection. Most models use threaded lenses that unscrew for lamp changes without disturbing the burial.
Aiming matters. A 30-degree beam spread works for narrow tree trunks or columns, while 60-degree floods cover wide façades. Fixtures typically rotate 360 degrees and tilt up to 30 degrees within the housing. For uplighting deciduous trees, position the fixture at the dripline aiming inward so winter branches still catch light.
Installation tip: Line the excavation with landscape fabric and backfill with pea gravel before setting the canister. This improves drainage and prevents the fixture from sinking or tilting over time.
Path and Step Lights
Path and step lights sit at or just above grade, casting pools of light along walkways or highlighting stair treads. Unlike well lights, the fixture housing remains partially exposed, usually 1 to 3 inches, with a low-profile shroud or integral stake.
Step lights often mount flush into riser faces using a cut-in housing and trim kit, similar to a recessed ceiling can. This requires access from behind the riser (doable during construction or retrofit if the riser isn’t solid-filled). Surface-mount versions attach with screws and work on existing hardscape but protrude slightly.
Beam patterns vary widely. Hooded or louvered lenses reduce glare and light trespass, directing output downward in a half-moon pattern. Open-face models spread light 180 degrees, better for wider paths but potentially bothersome to neighbors.
Material choice affects longevity. Composite or reinforced nylon bodies handle freeze-thaw and UV exposure better than thin plastic. Stainless steel or copper fixtures add a premium look and outlast coated metals in coastal or high-moisture climates.
Spacing rule of thumb: Place path lights every 8 to 10 feet for continuous coverage, closer on curves. Step lights go on every tread or every other tread depending on riser height, taller risers need more frequent lighting.
How to Plan Your In-Ground Lighting Layout
Start by walking the property at dusk with a flashlight or portable LED worklight. Shine it up trees, across pathways, and onto architectural features to preview angles and coverage. Take photos and notes, what looks dramatic, what creates harsh shadows, where fixtures might obstruct foot traffic.
Identify priority zones: entries, steps, pathways, and high-visibility plantings. Secondary areas include seating zones, water features, or side gates. Don’t try to light everything: strategic shadows add contrast and prevent the yard from looking like a parking lot.
Draw a scaled plot plan (graph paper or a phone app works). Mark fixture locations, wire runs, and the transformer position. Measure distances between fixtures and back to the transformer to calculate total cable length. Low-voltage wire loses voltage over distance, 12-gauge wire supports runs up to 100 feet on a 12V system, while 14-gauge taps out around 50 feet. For longer runs, consider a 24V transformer or multiple circuits.
Check local codes. Most jurisdictions don’t require permits for low-voltage landscape lighting, but verify transformer placement (some codes mandate GFCI protection and weather-resistant enclosures). If tapping into household circuits, an electrician may need to handle the connection.
Account for seasonal changes. Deciduous trees lose foliage: perennials die back. Position fixtures to light structural elements, trunks, branches, hardscape, that remain year-round. Consider using adjustable fixtures so beam angles can shift as plants mature.
Factor in maintenance access. Avoid burying wire under future hardscape or planting beds where excavation will sever lines. Leave slack at each fixture for repositioning and service.
Installation Tips for In-Ground Landscape Lighting
Gather tools and materials before digging:
- Transformer (sized for total wattage plus 20 percent headroom)
- Low-voltage landscape wire (12 or 14-gauge, direct-burial rated)
- In-ground fixtures with lamps and trim kits
- Trenching spade or flat shovel
- Wire strippers and waterproof connectors
- Gravel or coarse sand for backfill
- Safety glasses and work gloves
Trench depth matters but isn’t extreme. Bury wire 6 to 12 inches deep, deep enough to avoid casual digging but shallow enough to avoid irrigation lines and roots. Mark the trench path with spray paint, then call 811 to locate underground utilities before breaking ground.
Use a trenching spade to cut a narrow, clean slot. Lay direct-burial rated cable (not standard zip cord) along the bottom, leaving 12 inches of slack at each fixture location. Avoid sharp bends, which stress copper and increase resistance.
Connect fixtures with twist-on waterproof connectors or piercing connectors rated for wet locations. Twist-on caps filled with silicone gel provide the most reliable seal: cheap wire nuts will corrode. Strip insulation cleanly and twist wires clockwise before capping.
Backfill trenches with native soil first, then add a layer of coarse sand or gravel around fixture housings to promote drainage. Tamp lightly, don’t compact so hard you crush the wire.
Test the system before final burial. Power on the transformer and verify each fixture lights. Check for flicker (loose connections), dim output (voltage drop), or dead zones (severed wire). Use a multimeter to measure voltage at the farthest fixture, it should read within 10 percent of the transformer output.
Aim and level fixtures after testing. Well lights should sit plumb with trim rings flush to grade. Adjust beam angles while the system is live so you can see coverage. Lock set screws or rotation collars once positioned.
Finish by topping trenches with sod, mulch, or stone to match surrounding grade. Flag fixture locations with temporary markers so they’re visible until you memorize placement, this prevents accidental damage during mowing or edging.
Safety note: Always turn off power at the transformer and unplug it before handling wiring or lamps. Even low-voltage systems can arc and cause burns at connection points.
With fixtures in place and wired correctly, program the transformer’s timer or photocell to match your schedule. Most homeowners run lights from dusk until 10 or 11 p.m., balancing ambiance with energy use. Adjusting intensity and timing seasonally keeps the system efficient and the yard inviting year-round.