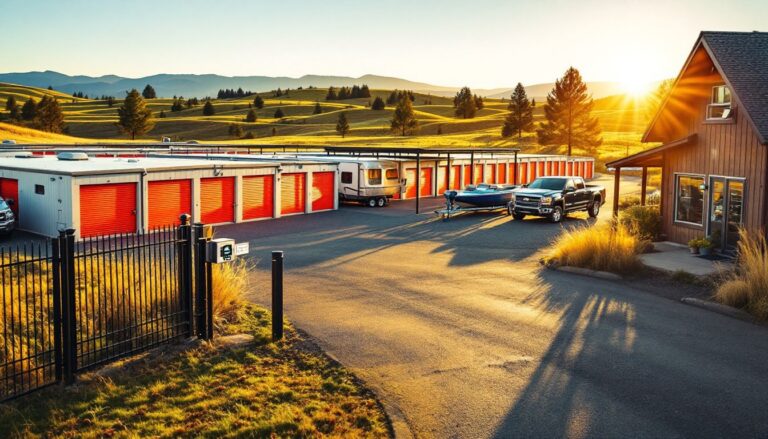

LED landscape lighting kits have changed the game for homeowners who want professional-looking outdoor lighting without the cost and complexity of a custom install. These pre-packaged systems bundle everything needed to illuminate pathways, highlight architectural features, and add security, all while cutting energy costs by up to 80% compared to halogen alternatives. With low-voltage wiring that doesn’t require an electrician in most jurisdictions and fixtures designed for decades of outdoor use, LED kits make it possible to tackle a lighting project over a weekend. The result is curb appeal that doesn’t quit when the sun goes down.
Table of Contents
ToggleKey Takeaways
- LED landscape lighting kits reduce energy costs by up to 80% compared to halogen alternatives while lasting 15-25 years, making them a cost-effective long-term investment.
- These pre-packaged systems operate on safe low-voltage (12V or 24V) wiring that doesn’t require an electrician in most areas, enabling weekend DIY installation for professional results.
- Quality LED landscape lighting kits should feature die-cast metal fixtures, 12-gauge cable for longer runs, and weatherproof connectors with dielectric grease to prevent corrosion.
- Proper planning—including layout simulation at dusk, correct cable burial at 6 inches, and voltage drop management—ensures optimal light distribution and prevents flickering or dim fixtures.
- LED fixtures require minimal maintenance beyond annual connection inspections and twice-yearly lens cleaning, compared to halogen bulbs that burn out every 2,000-4,000 hours.
What Are LED Landscape Lighting Kits and Why Choose Them?
An LED landscape lighting kit is a bundled system that includes multiple light fixtures, a transformer, low-voltage cable, connectors, and often stakes or mounting hardware. These kits are designed to work together right out of the box, eliminating the guesswork of matching components.
Most residential kits operate on 12-volt or 24-volt systems, stepping down from standard 120V household current through a transformer. This makes them significantly safer than line-voltage systems and exempt from permit requirements in many areas, though it’s worth confirming local codes before installation.
Homeowners choose LED kits over traditional halogen or incandescent options for three main reasons: energy efficiency, longevity, and reduced maintenance. LEDs draw a fraction of the wattage while delivering comparable or better light output. A typical LED landscape bulb uses 3-5 watts versus 20-35 watts for halogen, and most are rated for 30,000-50,000 hours of use. That translates to 15-25 years at typical usage rates.
The plug-and-play nature appeals to DIYers who want results without hiring a landscape lighting contractor. Kits range from basic 6-light path setups under $150 to comprehensive 12+ fixture systems with smart controls approaching $600-800.
Key Components Found in Quality LED Landscape Lighting Kits
Understanding what’s inside the box helps buyers evaluate kit quality and compatibility with their property.
Transformer: The heart of the system. Look for models rated at least 20% above your total wattage needs to prevent overload. A 150-watt transformer, for example, should power no more than 120 watts of lights. Better units include photocells for automatic dusk-to-dawn operation, timers, and multiple voltage taps (12V, 13V, 14V, 15V) to compensate for voltage drop on longer cable runs.
Fixtures: Kits typically include a mix of spotlights, path lights, and sometimes well lights or wash fixtures. Quality fixtures feature die-cast aluminum or brass housings rather than plastic, with powder-coated finishes that resist corrosion. Integrated LEDs (non-replaceable) are common, but some premium kits use replaceable LED bulbs with standard bases.
Cable: Most kits include 12-gauge or 14-gauge landscape wire. Thicker 12-gauge handles longer runs with less voltage drop, critical if fixtures will be more than 50 feet from the transformer. Direct burial cable is rated for underground installation without conduit.
Connectors: Quick-connect hubs or piercing connectors make wiring faster but can be failure points if not weatherproofed properly. Twist-on wire nuts with silicone-filled caps or heat-shrink connectors offer more durability.
Mounting Hardware: Stakes for path lights, adjustable mounts for spotlights, and sometimes masonry anchors for wall-mount fixtures. Check that stakes are metal, plastic versions crack in frozen ground.
Top Benefits of Using LED Landscape Lighting Kits
Beyond the obvious appeal of a complete system, LED kits deliver practical advantages that matter over the long term.
Energy savings show up on every electric bill. Running a typical 8-light LED kit for five hours nightly costs roughly $3-5 per month, compared to $12-20 for halogen equivalents. Over the 20+ year lifespan of LED fixtures, that’s hundreds of dollars in savings.
Reduced maintenance is a bigger win than most realize. Halogen bulbs burn out after 2,000-4,000 hours, requiring frequent replacement. Accessing fixtures buried behind landscaping or mounted high on eaves is a hassle. LEDs eliminate that cycle almost entirely.
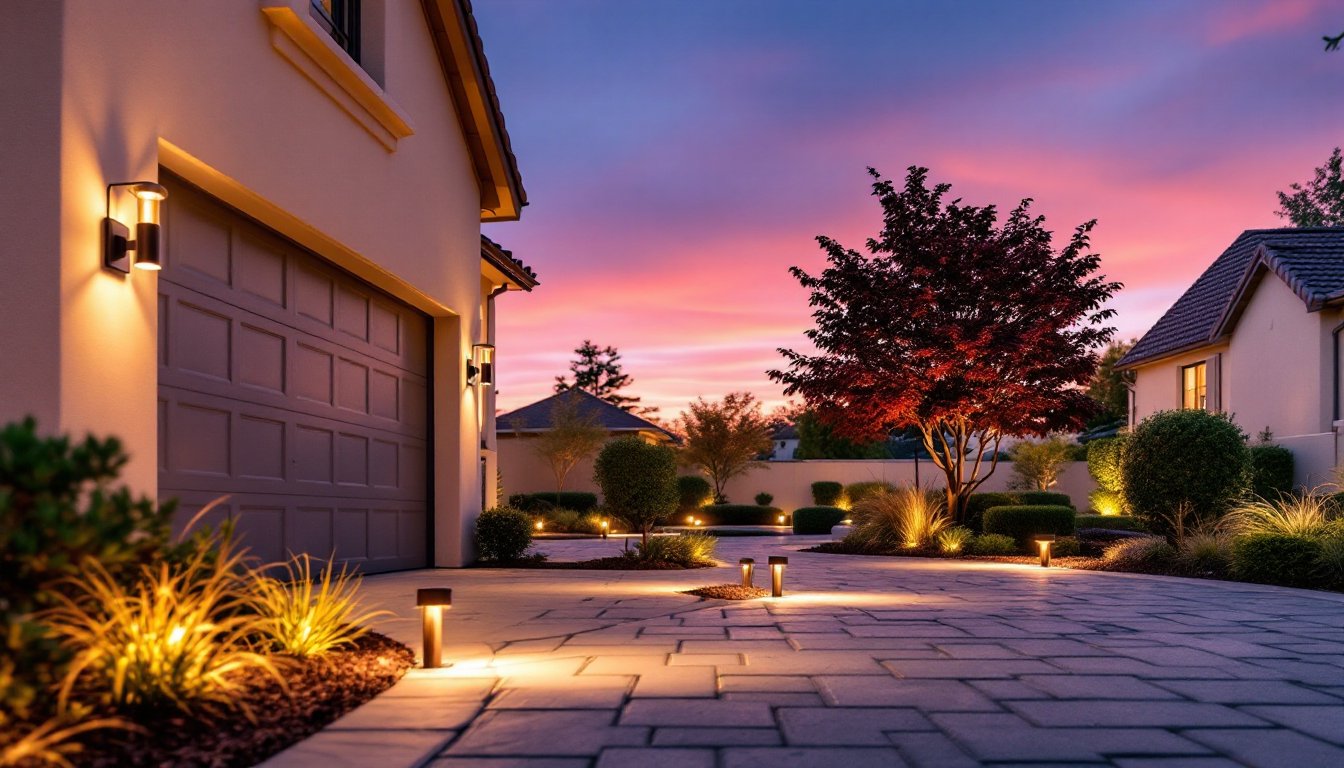
Better light quality has improved dramatically in recent years. Early LEDs had harsh color rendering and narrow beam spreads. Modern landscape LEDs offer warm white tones (2700K-3000K) that flatter architecture and plantings, with beam angles from tight 15-degree spots to broad 60-degree floods.
Safety and security improve with properly lit pathways, stairs, and dark corners around the property. Motion-sensor-capable transformers can trigger lights when activity is detected, adding a layer of deterrence without running lights all night.
Environmental impact is lower across the board. LEDs contain no mercury (unlike CFLs), produce minimal heat, and their long service life means fewer fixtures in landfills.
How to Choose the Right LED Landscape Lighting Kit for Your Property
Selecting a kit starts with assessing the property and defining priorities.
Calculate coverage needs: Walk the property at dusk and note areas that need illumination, front walkway, driveway edges, architectural features, trees, or patio spaces. Count potential fixture locations and measure distances from a power source (usually an outdoor outlet or garage).
Match wattage to transformer capacity: Add up the wattage of all included fixtures. If the kit includes eight 4-watt fixtures (32 watts total), a 60-watt transformer provides adequate headroom. Plan to expand? Buy a larger transformer upfront, it’s harder to upgrade later.
Consider fixture types: Path lights work for walkways, but spotlights (with adjustable heads) are more versatile for highlighting trees, walls, or landscaping. Well lights recess into the ground for uplighting without visible hardware. Mixed kits offer flexibility.
Evaluate build quality: Fixtures should feel substantial, not hollow. Check for gasket-sealed lenses and water-resistance ratings of at least IP65 (protected against dust and water jets). Brass and copper patina naturally over time: aluminum stays consistent with coatings.
Smart features or manual?: Wi-Fi-enabled transformers allow scheduling and dimming from a phone app. They cost more but add convenience. Manual timers and photocells work fine for set-it-and-forget-it operation.
Expandability: Some systems use proprietary connectors or non-standard voltages. Choose kits compatible with standard low-voltage landscape components if future additions are likely.
Installation Tips and Best Practices
Most LED landscape lighting kits install in a day with basic tools and no special skills, but a few steps separate pro-looking results from sloppy ones.
Plan the layout before digging: Set fixtures in place without wiring and review at dusk using a flashlight to simulate beam patterns. Adjust spacing and angles, path lights typically sit 8-10 feet apart: spotlights depend on beam angle and distance to target.
Mount the transformer properly: Install it near a GFCI-protected outdoor outlet, at least 12 inches above ground to avoid splash and moisture. Most building codes allow low-voltage transformers outdoors, but verify local requirements. Use the included mounting bracket: don’t let it sit on the ground.
Bury cable at the right depth: Direct burial cable should run 6 inches deep minimum to protect from shovels and frost heave. Shallow runs near the surface invite accidental damage. For runs under driveways or high-traffic areas, use schedule 40 PVC conduit for added protection.
Avoid long single runs: Voltage drop increases with distance, dimming lights farthest from the transformer. Keep runs under 100 feet on 12-gauge wire or use a hub-and-spoke layout with multiple home runs from the transformer. Alternatively, use higher voltage taps (14V or 15V) on the transformer to compensate.
Secure connections: Moisture is the enemy. Use dielectric grease on connectors, wrap with self-fusing silicone tape, and bury connection points in a splice box if possible. Piercing connectors are fast but prone to corrosion, twist connectors with weatherproof caps last longer.
Test before burying: Power up the system and check every fixture. Adjust angles and tighten stakes. Finding a bad connection after backfilling the trench is frustrating.
Safety gear: Wear gloves when handling fixtures with sharp edges and safety glasses if cutting cable or drilling. If trenching by hand, take breaks, repetitive digging causes blisters and strain.
Maintenance and Troubleshooting Your LED Landscape Lights
LED systems are low-maintenance, but seasonal checks keep them performing.
Clean fixtures twice a year: Dirt, pollen, and spider webs block light output. Wipe lenses with a damp cloth and mild detergent. Check that drainage holes in fixtures aren’t clogged, trapped water shortens LED life.
Inspect connections annually: Corrosion shows up as green or white residue on wire connectors. If lights flicker or dim, pull apart suspect connections, clean with a wire brush, apply fresh dielectric grease, and re-seal.
Trim encroaching vegetation: Shrubs and groundcover grow over fixtures, blocking light and trapping moisture. Prune back plantings and adjust fixture angles if landscape has matured since install.
Check transformer settings: Photocells can drift or fail, leaving lights on during the day or off at night. Test the sensor by covering it, the lights should turn on. Timers may need resetting after power outages.
Common issues:
- Lights won’t turn on: Check GFCI outlet, transformer power switch, and photocell sensitivity dial. Verify wire connections at transformer terminals.
- Dim or flickering lights: Voltage drop from undersized wire, loose connections, or too many fixtures on one run. Redistribute load or upgrade to 12-gauge cable.
- One fixture out: Likely a failed LED (rare) or corroded connector at that fixture. Bypass the fixture temporarily to confirm.
Winter prep: In freezing climates, confirm fixtures drain properly and that stakes haven’t heaved out of the ground. Disconnect and store any fixtures not rated for extreme cold.
Conclusion
LED landscape lighting kits bring professional-grade outdoor lighting within reach of any homeowner willing to spend a weekend on installation. By choosing a system matched to property size, burying cable correctly, and keeping connections weather-tight, DIYers can achieve results that last decades with minimal upkeep. The combination of energy savings, durability, and immediate curb appeal makes these kits one of the highest-value improvements a property can receive.